Pumpkin Pie with Spicy Pepita Brittle

We loved this refreshing variation on pumpkin pie. I topped it with a spicy pepita (shelled pumpkin seed) brittle. The brittle is pretty easy, as far as candy making goes. I adapted a recipe from sophistimom by making it spicier with a lot more cayenne. It really compliments my real pumpkin pie recipe.

Real Pumpkin Pie with Spicy Pepita Brittle

Spicy Pepita (Pumpkin Seed) Brittle Recipe

Adapted from sophistimom

  • 3 tablespoons butter
  • 1 cup (200g) brown sugar
  • 1/2 cup (150g) honey
  • 1 teaspoon cinnamon
  • 3/4 teaspoon cayenne pepper
  • 1/2 teaspoon nutmeg
  • 1/2 teaspoon cardamom
  • 1/4 teaspoon ginger
  • 1/2 teaspoon salt
  • 1 cup (65g) raw, hulled, pepitas or pumpkin seeds
  • 1/2 teaspoon baking soda

1. Butter a large cookie sheet or line it with a silicone mat. Melt butter in a heavy bottomed saucepan set over low heat. Stir in sugar, honey, spices and salt. Stir ingredients together until the sugar starts to dissolve.

2. Raise heat to medium and let the sugar come to a boil. When it reaches 280°  on a candy thermometer, stir in pumpkin seeds. Bring the mixture up to 300°  (hard crack stage). Remove from heat and stir in baking soda. Pour onto prepared cookie sheet and allow to cool.

 Pumpkin Pie Recipe – click here

All Butter Crust Recipe – click here

Need a Gluten Free variation?

Bake individual sized pumpkin custards and then top with the brittle. Your gluten free friends will enjoy the crunch and texture of the brittle and how it contrasts with the creamy custard.

pumpkin pie with spicy pepita brittle - gluten free option

Enjoy and Happy Thanksgiving!

Real Pumpkin Pie with Maple Whipped Cream

Ditch the cans this year! Try this real pumpkin pie made with a sugar pie pumpkin, honey, cream and milk, eggs, fresh ginger, spices and love! I use the word “real” to mean fresh, whole, and unprocessed foods, and without refined sugar. I made this last year for Thanksgiving. It was gone in a few minutes, leaving the store-bought pumpkin pie next to it largely intact. I’ve since made it three or four more times and my family is in love.

Real Pumpkin Pie with Maple Whipped Cream

So, can a pie by a healthy treat? Maybe this one! Pumpkin is low in calories, and high in fiber and disease-fighting vitamins. It is one of the best source of bioavailable carotenoids and is considered by some to be a super food.  I always knew I was onto something when I ate pie for breakfast! My dad used to do it, too.

To can or not to can?

I recently read an article detailing why canned pumpkin makes better pie. I was dubious, which was confirmed when I saw the “news” was sponsored by one of the largest manufacturers of canned pumpkin. Hmmmm…. And I bet anyone who has made pumpkin pie has tried either evaporated or condensed milk. But think about it… Cans are a great way to preserve food for when fresh isn’t available. Do you have access to fresh dairy? I’m guessing yes. I dare you to try this recipe and tell me fresh isn’t more flavorful. Roasting the pumpkin whole and peeling it when cool makes it super easy, as well. I use a blender to make the batter, leaving my mixer free for whipping cream!

Real Pumpkin Pie with Maple Whipped Cream

Real Pumpkin Pie Recipe

Adapted from allrecipes.com. Makes one 9″ pie.

  • 1 medium sugar pie pumpkin (2 cups of cooked pumpkin puree)
  • 1 teaspoon freshly grated ginger (or 1/2 teaspoon ground ginger)
  • 1 teaspoon ground cinnamon
  • 1/2 teaspoon freshly grated nutmeg
  • 1/2 teaspoon allspice
  • 1/2 teaspoon salt
  • 3 large eggs
  • 3/4 cup honey, slightly warmed up
  • 1/2 cup milk
  • 1/2 cup heavy whipping cream
  • 1 uncooked single pie crust, kept refrigerated in pan until ready to use

Preheat oven to 375° F. Place pumpkin directly on a center rack. Roast about one hour until the flesh is soft to the touch with an oven mitt. Turn off the oven and allow the pumpkin to cool completely.

Preheat the oven to 400° F. Peel the skin off the pumpkin and separate the flesh from the strings and seeds. Place the flesh in a good blender or food processor and blend until smooth. Next, since pumpkins vary in size, put the puree into a bowl and then measure 2 cups of pumpkin puree and return it to the blender. (No need to wash or rinse the blender in between!) Reserve any extra puree for Pumpkin French Toast Bread Pudding.

Add the spices, eggs, honey, milk and cream to the blender and mix until everything is uniform and smooth. Pour into the pie crust shell. Bake for 50 to 55 minutes or until the center is set. Serve warm or room temperature.

Options for serving:

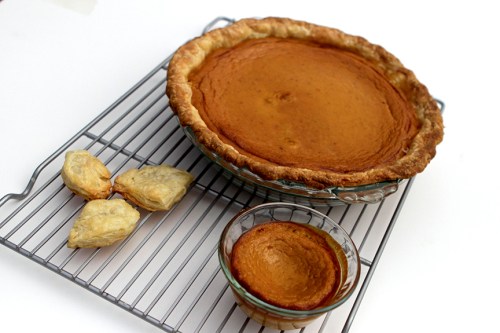
Use leftover crust to make “cookies” in the shape of leaves. Sprinkle with cinnamon and sugar. Bake them for 10 minutes or until golden. Kids love to help with this!

Decorate with a spicy pepita (pumpkin seed) brittle. See the next post for the brittle recipe.

Serve with maple whipped cream, recipe follows.

For gluten-free friends, pour some of the pumpkin batter into single serving oven-safe custard bowls or ramekins. Bake about 25 minutes until set. Decorate with spicy pepita brittle for some crunch and texture.

Real Pumpkin Pie - gluten free option

Maple Whipped Cream

  • 1 cup of heavy cream
  • 1 Tablespoon of maple syrup

In the clean bowl of a mixer, beat the cream and maple syrup on high until soft peaks form. Keep refrigerated.

Baking Pie with Little Bird

Happy weekend, friends! Here is a sneak peak of our pumpkin pie. Little Bird is cutting cookies out of the pie dough scraps. I found some mini cookie cutters of leafs and pumpkins. Naturally, no kid can resist.

Baking pie and cookies with little children

She was also a natural at rolling dough and measuring cups of flour. She even came up with an innovation I will copy! I instructed her to sprinkle the little leaf cookies with cinnamon and sugar, but instead she picked up and pressed each cookie into the bowl of sugar and spice. It stuck better and was distributed better. Love that!

We are making pumpkin, but used the same all butter crust recipe from my chocolate espresso pecan pie post here.

My only lament is that her cookies will not make it to the top of the pie. Little Bird and Papa finished them off while I was taking a nap with Baby. I don’t know what we are having for dinner, but I am off to finish dessert.

Eating Our Greens

Just a quick shot of today’s harvest. Tender rainbow chard, mustard greens, lacinto kale and red Russian kale. Papa Bird quickly sautéed them in coconut oil. Greens that fresh don’t need a lot done to them.

20131110-191357.jpg

Not that long ago, he and his friend, Mark, built a new raised bed by the house. They used a new (to us) technique called hugelkultur, a permaculture practice of layering wood and soil “like a lasagna”.

Here’s a link to another blog with some more on hugelkultur: click here. I like that their chickens look a lot like Bebe and Butters, and that they have a toddler helping, just like Little Bird helped Papa and Mark. Plus she dug up the yard while babywearing! (And I thought I was crunchy for babywearing while composting diapers!)

Painting the Walls?! Art Party at Paint The Walls

Little Bird and I ventured out of the house the other day to check out Paint the Walls. (Baby came too, but she mostly snoozed.) It’s a great place for kids! For all the times I tell her not to color and paint on the walls, finally she got to go wild and paint. The best part? I didn’t have to clean anything up!

Painting the Walls

They provide all the art supplies, smocks and even have some yummy snacks available.  For $10/child (and $8 for a 2nd child), you can come as a drop-in. Infants are free. Parents are free and are expected to stay, although Paint the Walls does offer drop-off camps during school holidays. Unlimited paint, paper, pens and play dough are included. And did I mention that they clean up? The paint is washable and they use natural cleaning products to clean off the walls at the end of the day. There are also chalkboard walls and chalk.

Drawing at Paint the Walls SD

Disclaimer: We were invited, along with a few other bloggers, to check out Paint the Walls for free. But all opinions are mine, and we definitely plan on going back again as civilians. Paint the Walls has been in Poway for a little while, but was bought by a local family two weeks ago.  Kathy and Kathy are super sweet and very welcoming. They also shared a tip: look out for a Living Social promotion this Wednesday.

20131108-152230.jpg

Along with the open art time, they also book private birthday parties. Recently, an 8-year-old girl hosted 20 friends. At her request, the chalk wall area was turned into a dance party. Check the website for a promotion on parties booked during the month of November-perfect for the cooler months. It is not on the website, but they also offer a discount for “mini parties” of less than 9 children. They seem pretty accommodating, so I recommend just talking to the owners about anything you have in mind. For example, they have partnered with Green Kid Crafts in the past (another cool local business) and, just brainstorming, perhaps could order creativity kits for your party?

20131108-152244.jpg

I love that the play dough is homemade. And I’m pretty sure it had some sparkly glitter in it. Hmmm, they offer discounts to play groups… Little Bird just might have to get some of her friends to come back with her!

Paint the Walls SD

Paint the Walls Contact Info:

Website: www.paintthewallssandiego.com

Address: 11385 Poway Rd, Suite 108
San Diego 92128
Sabre Springs Plaza
(Corner of Springbrook Dr, near 7 Eleven)

Phone: 858-722-6920

Email: paintthewallssandiego@gmail.com

Facebook: Paint the Walls Page