Tag Archives: dessert

Pepita (Pumpkin Seed) Streusel

Raw pepitas, or green pumpkin seeds, have a sweet and nutty flavor. They are the perfect base for a streusel topping. Use it to top pumpkin muffins, ice cream, oatmeal, yogurt parfaits, or this satisfying pumpkin custard I shared today.

Ginger Maple Pumpkin Custard with Pepita Streusel

At the risk of sounding like a scene from Forest Gump, let’s talk the sweet incantations of pumpkin:

pepita streusel ingredients

Find these recipes and more in my Pinterest Board devoted to all things pumpkin, “Pumpkin Everything.”

Pepita (Pumpkin Seed) Streusel
Author: 
Recipe type: Dessert
Cuisine: American
Prep time: 
Cook time: 
Total time: 
 
A crunchy topping, made with green pumpkin seeds (pepitas), brown sugar, oats, and cinnamon. Perfect for topping pumpkin pie or ginger pumpkin custard. Keep leftovers to top ice cream, yogurt, and more.
Ingredients
  • 2 tablespoons butter
  • ½ cup raw pepitas (hulled pumpkin seeds)
  • ¼ cup rolled oats
  • ¼ cup flour
  • ¼ cup brown sugar
  • ½ teaspoon cinnamon
  • ¼ teaspoon salt
Instructions
  1. Preheat oven to 350* F.
  2. Melt the butter in a small glass mixing bowl by microwaving for 10-15 seconds. A few unmelted lumps are fine.
  3. Add the rest of the ingredients to the bowl, stir to mix well.
  4. Scatter the batter over a baking sheet lined with a silicon mat or parchment paper, and bake for 5 minutes or until browned.
Notes
My streusel still looked "wet" when it had started browning. I pulled it out of the oven anyway and it turned out well. Don't let it burn.


Red Velvet Cake with No Food Coloring

Happy Valentine’s Day! I shared the other day on my mental health blog about loving one’s self. Here I’d like to share one way to love someone special. Bake a cake! And if you are concerned about not feeding your family artificial dyes and ingredients, here’s one way to have your cake and eat it, too. I have made red velvet cupcakes before using beets to color them. This Valentine’s I tried out a red velvet cake with no food coloring.

red velvet cake with no food coloring

Last week I was helping Little Bird with a science kit, and we were learning about acids, bases, and ph. We experimented with adding acidity (in the form of citric acid and vinegar) and baking soda (with is alkaline) to water colored with red cabbage powder. The acid made it more vibrantly red and the base made it more purple. No wonder red velvet has something acidic like lemon juice and/or vinegar in it! It also made me wonder if too much baking powder was the reason the red velvet potato bundt cake I tried to make came out purple/brown. (I love learning more of the science behind baking.)

red velvet cake with no dye

I consider this more a recipe review than a super polished recipe. But I wanted to share none the less. I have only made it one time, and would tweak it some more to make it a little lighter. I used the suggested cream cheese, but found it way too dense, for my preference. I would replace that with buttermilk, and use more eggs. I reduced the sugar by half, in both the cake and the frosting. Next time I might play around with non-refined sweeteners.

Red Velvet Cake with NO Food Coloring

5.0 from 1 reviews
Red Velvet Cake with No Food Coloring
Author: 
Recipe type: Dessert
Cuisine: American
 
This recipe makes a dense red velvet cake, colored by beets and without any food coloring or dye.
Ingredients
  • 2 large beets (enough for 1 cup puree)
  • ¼ cup freshly squeezed lemon juice
  • 1 tablespoon apple cider vinegar
  • 2 sticks (16 tablespoons) unsalted butter, room temperature
  • 1 8 ounce package of cream cheese or 1 cup of buttermilk
  • 1 cup sugar
  • 6 eggs, room temperature
  • 1½ teaspoons pure vanilla extract
  • 2 cups unbleached all-purpose flour
  • 1½ teaspoons baking powder
  • 1½ teaspoons kosher salt
  • 2 tablespoons natural raw cocoa powder
  • 2 recipes cream cheese frosting
Instructions
  1. This recipe is adapted slightly from a post from sophistimom. I did not change her method, so follow the link for the instructions. Here are my notes, however:
  2. Starting with raw beets seems more labor intensive, but my past results using packaged, pre-cooked and peeled beets did not work as well.
  3. My Vitamix did not process the beets well, as it wasn't full enough or liquid enough. My old Kitchen Aid food processor worked great, and I wish I would have started with it from the beginning.
  4. I found it too dense and heavy with the cream cheese. I suggest buttermilk, which I will use next time.
  5. I used 4 eggs as called for in the original recipe. Next time I will increase it to 6. My mom suggested separating the eggs, beating them separately to give it more leavening from the egg whites, and then folding them in.
  6. For the frosting, I made a double batch of my Cinnamon Cream Cheese Frosting, omitting the cinnamon and pumpkin.

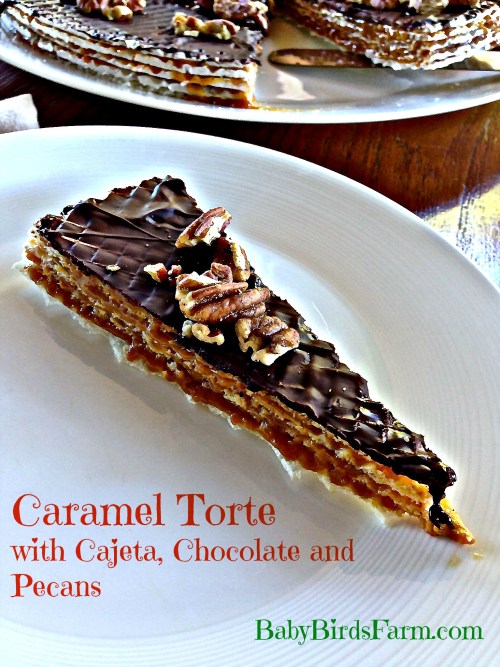
Caramel Torte with Cajeta, Chocolate and Pecans

As I add photos to this post, I have to get up and grab another slice of the Caramel Torte. It is deceptively simple to make with just four ingredients: cajeta (or another form of caramel), wafers, melted dark chocolate and salted, toasted pecans.

Caramel Torte Recipe with Chocolate and Pecans

I have been making cajeta out of our extra goat’s milk for some time in the form of a syrup. Click here to read more about cajeta and see a recipe with step by step photos and directions. But I have been wanting to experiment with making it thicker, more like candy, and when I stumbled upon torte-sized wafers in a local ethnic store, I thought they would be a perfect vehicle for cajeta. I reduced the cajeta down further than I usually do (from 2 quarts of milk to 2 cups of caramel instead of 3-4 cups of syrup) and added a pinch of salt. It was pretty delicious layered between the wafers, but I had to take the caramel torte to the next level by pouring dark chocolate and sprinkling on toasted, salted pecans on top.

Caramel Wafer Torte Recipe

Caramel Torte Recipe

  • 2 cups of caramel, dulce de leche or cajeta
  • 1 package of torte-sized wafers
  • 3 oz. of dark chocolate
  • 2 handfuls of salted pecans

Step 1:

(If making cajeta. Otherwise, store bought is fine.) Use the recipe and instructions for cajeta. Cook further until dark and thick, or reduced to approximately 2 cups, and stir in a pinch of salt.

Step 2:

Chop the chocolate and melt in a double boiler. Allow to cool. Toast the pecans in a dry pan and allow to cool. (I keep my nuts in the freezer. If yours are room temperature and roasted, you can skip toasting.)

Step 3:

Assembling. Spread the caramel or cajeta on top of a wafer. Continue to alternate layers of caramel and wafers until one or both are used up. Finish with a wafer. Spread the melted chocolate on top. Finally, sprinkle the pecans over the top. Chill in the fridge for at least one hour before cutting and serving.

Caramel Torte Recipe with Chocolate and Pecans

Click on any of the thumbnails in the gallery below to see enlarged, step by step pictures.

I hope you enjoy it and share!

Caramel Torte with Cajeta, Chocolate and Pecans