Tag Archives: Garden tips

6 Tips for a Southern California Edible Garden in the Summer

Hi! Abby here. You may have noticed in my Mother’s Day post that I mentioned we moved. It’s true! We no longer have a third of an acre on a canyon as our backyard, playground, and chicken farm. It was a fast move, and our edible garden was just getting good on the day we moved. 

edible garden

Our new backyard will have room for some small garden boxes. Which brings me to the question: can you plant new vegetables in the heat of a San Diego summer? Guest blogger, Emily, recently reached out wanting to share some of her knowledge of gardening and conservation. She put together this guide for us with her best tips for planting edible summer plants in Southern California. 

Best Edible Summer Plants to Grow in Southern California

Southern California is a unique area with a climate that is varied, ranging from Mediterranean to desert-like conditions. Summers in SoCal are warm and dry with infrequent rain, so growing during the warmest days can be a bit of a challenge. However, overall, Southern California has an amazing climate for growing almost anything.

The average temperature in July is 92 degrees with only .04 inches of precipitation. Fortunately, there are still a number of edible plants that do well in this type of warmer weather and will thrive for you. There are also tweaks you can use to help plants grow better or take root when you transplant them.

1. Choose Plants that Take Heat

anasazi green beans

The harsh summer sun cooks delicate plants. In the summer, focus on plants that withstand heat, such as sunflowers, beans (like the Anasazis, pictured above) and corn. There are some additional things you can do to help these plants withstand dry conditions, such as regular watering and installing an irrigation system in your garden. Make sure you water early in the morning or early in the evening, so the water doesn’t heat up and further cook your plants.

2. Shade Transplants

When first moving plants to a new edible garden, they are particularly vulnerable. Use screens or taller plants to create shade for these transplants until they fully take root in the soil. Remember that the sun is harsher from June until August, so anything you can do to reduce the intensity a bit, without completely taking it away, will help your new plants. The key to planting in the summer is to do it in the morning or evening when temps are cooler.

3. Plant Melons

Melons tend to love the heat and absorb the sun. While they do need some water, they do okay in drier conditions as long as you give them water occasionally. To see if they need watering, pay attention to the vines and make sure they aren’t drying out too much. The first thing to suffer if the plant gets too dry is the edible part of the plant, or the melon. You can also purchase water stakes that deliver water to the roots of the plant throughout the day.

4. Pick Heat Tolerant Greens

Wouldn’t it be wonderful to grow your own organic salad? Unfortunately, many varieties of lettuce or vulnerable to heat and wilt in the summer sun. There are some heat hardy varieties, such as magenta spreen and calaloo amaranth. Choose varieties that do better in the sun both for garden décor and to make a salad for your next dinner.

5. Start Your Winter Vegetables

In August, start your winter vegetables. Some varieties that do well in the area include cabbage, broccoli, kale, leeks, onions and fava beans. If you’re worried cool weather will arrive sooner rather than later, plant in pots or above ground gardens, so you can easily cover and protect from the cooler nights.

6. Choose Everbearing Strawberries

strawberry picking

Southern California grows about 80 percent of the strawberries in America thanks to the perfectly suited soil that drains quickly. Even though it is ideal to plant in cool weather, so that the blooms develop properly, everbearing plants will bear fruit all summer long, giving you fresh berries to enjoy during the warmest days of summer.

Growing Your Edible Garden

Summer is a good time to enjoy the fruits of your edible garden labor. You don’t need a lot of acreage to grow your own garden, either. Even a patio will suffice if you’re willing to go vertical or put plants in pots. Although you’ll need to pay particular attention to how much water plants get, overall the milder weather of Southern California allows you to not only grow fabulous crops in the summer, but to enjoy fresh foods all year long.

About Guest Author, Emily Folk:

Emily Folk, guest author on Conservation and Sustainable GardeningEmily is passionate about gardening and is currently working on a three bin composting system. You can read more of her work on her blog, Conservation Folks.

Emily on Twitter

Emily on Google+

Emily on LinkedIn

Anasazi Green Beans

If you have seen my previous posts on Anasazi Beans then you know I am a huge fan of the heirloom bean. Although we typically allow them to dry right on the vine and then use the beans as you might use pintos or black beans, I recently learned that Anasazi green beans are another delicious option!

anasazi green beans

Papa Bird has Anasazis growing as vines along our bottom fence, but discovered a gopher had eaten the roots off of one of the plants. Since the plant was on the verge of toppling over, he picked them for use as Anasazi green beans!


For a recipe for the most delicious veggie burger ever, the legend of Anasazi Beans, and more on victory gardens, see my post on Anasazi Bean Burgers. And for more growing tips on Anasazis and a recipe for a twist on a Southern holiday classic, check out Anasazi Bean Hoppin’ John.

Can you recommend a recipe for Anasazi Green Beans?

We usually cook green beans simply, and Little Bird loved to gum them as one of her first “holding” foods at 8 months. But please tell me, what are your favorite recipes for green beans?

Composting Diapers?

How to compost diapers on BabyBirdsFarm.com

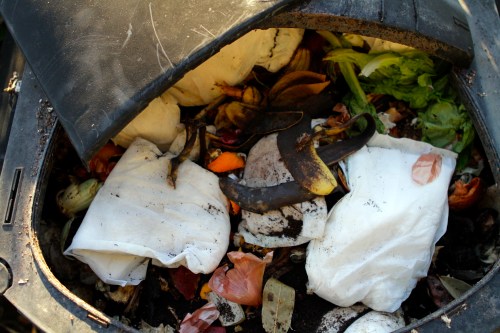
Not that long ago it was International Babywearing Day. I posted on our Facebook Page about how babywearing (which is simply wearing a baby or toddler in a sling, wrap or other carrier) has made it easier for us to cook, garden and compost. My sister laughed at the mention of babywearing and taking out the compost, questioning if she was truly related to someone so crunchy. I had to take it a step further saying that I chuckled myself the first time I wore baby while composting her wet diapers. Composting diapers? Yup. It may sound impossibly crunchy but more and more parents are ready for creative ways to reduce their babies’ impact on their environment. It is their earth to inherent, isn’t it?

One man's trash...

I recently shared more about why we like cloth and hybrid diapers in this last post, which also talks about how to set up and organize your system. Please do not try to compost a conventional disposable diaper. It would take eons and the plastic and chemicals in it would not be something you want in your garden, let alone your food. We only use gDiapers biodegradable inserts, which, as far as I know, are the only ones that are “cradle to cradle” certified and completely biodegradable.

Although we love the fit, feel and ease of use of using the whole gDiaper system, we initially had only so-so results flushing the biodegradable inserts. My husband was afraid they were negatively affecting the plumbing in our older home. Then I learned that not all in my household had read the directions and were trying to flush the inserts whole. Check out this link for tips on how to flush gDiaper inserts. I recommend getting everyone who will care for baby on the same page, something that in those fuzzy first few weeks of parenthood I must not have done as well as I thought. I also recently learned that flushing the inserts is not recommended when you have pipes infested with tree roots. We have a couple dozen malaluca trees in front of and around our house and just last week the city was working on the sewers and pulled out this massive root ball. (See the picture in the gallery below.)

But composting the biodegradable inserts is a win-win in my book. Urine is an excellent source of nitrogen, and a good source of phosphorus and potassium, making the practice of composting diapers a boon for the garden. Healthy urine is non-toxic. In fact, diluted urine has actually been used directly as a fertilizer.¹ All plants require micronutrients and nitrogen is often in short supply. Vegetables, in particular, are prone to nitrogen deficiency.² (By the way, legumes, such as beans, are an exception, as they actually produce nitrogen. This is why co-planting nitrogen-fixing beans with corn and squash is so helpful. Check out more on this in my post on the Three Sisters.)

To be clear, we do not compost diapers with poop. In our home all poop is flushed down the toilet, baby’s included (and chickens’ excluded). The sewer system is much better equipped to handle human waste than the trash system. Did you know that technically you are supposed to remove and flush the poop from disposable diapers before throwing them away? How many people do you think do that??

…any way, the veggies on the Bird Family Farm looove Baby Bird! (And she loves them.) We put every wet insert, about two/day, along with a lot of kitchen scraps and some yard clippings into a continuous composter. To get the inserts to break down faster, you could rip them open, but we never bother. And, voila! Black Gold…

Black Gold

Click on any photo below to enlarge.

¹http://en.wikipedia.org/wiki/Urine  ²http://en.wikipedia.org/wiki/Nitrogen_deficiency


Anasazi Bean Hoppin’ John

My mom is from the South and got me started making black eyed peas every New Year’s for good luck. Sometimes we make a spicy bean dip, but often she makes a traditional Hoppin’ John with sauteed onions.

After work the other day I set a cup of Anasazi beans to boil, not really sure the direction dinner would head. After that Baby Bird wanted to be held. Inspired by Hoppin’ John, I put a little brown rice in the rice cooker and threw the cooked beans together with the leftovers of the simple tomato sauce from this post. Post baby, I have a new definition of easy recipes: cooking one handed!

Anasazi Bean Hoppin’ John Recipe

Rinse and pick through the beans. Place in a large pot and add at least four cups of water. Add the bay leaves, cumin and epazote. Boil for about one hour until the beans are tender, adding water as needed to keep the beans covered. Drain.

While the beans are cooking, prepare rice in a rice cooker, or as you like.

Once the beans are done, rewarm the sauce with the cooked beans, just until heated up. Serve over the rice, accompanied with avocado, cilantro, lime, etc.

If you don’t have sauce, simply sauté some onions and garlic and add to the cooked beans.

Growing Tips

A subscriber to the Baby Bird’s Farm Facebook Page asked for more information on growing beans. Papa Bird likes to “direct sow” most beans meaning you can place a dried bean directly in the ground without sprouting. Plant an inch and a half deep and two inches apart. Thin to four inches apart. He generally recommends researching plants and selecting one that is appropriate for your zone, and they are traditionally grown in the Four Corners region, but he just kind of winged it with the Anasazis. Papa Bird also recommends researching whether the bean you have selected is a bush or a climbing vine, and planning accordingly. He shared that he felt like Anasazis were somewhere in between a bush and a vine in our garden, although supposedly they are vines.

For more info on growing check this article out.

About Anasazis

Please check out my first post on Anasazi Beans. Personally, it is one of my favorite posts. The beans can be bought locally in San Diego at the Hillcrest farmer’s market, on Amazon or from our “Store” page on this site.

Tomato Time: Putting Up for the Winter

It’s August in San Diego and my favorite time of year! I haven’t been to the beach as much as I would like, but our garden’s tomatoes are ready. To be honest, I can’t even buy them in the store any more. The taste just doesn’t compare.

This winter I decided not to purchase any out of season tomatoes  from the store. Even “organic” tomatoes grown out of season are probably grown in Mexico, using precious water and resources to the detriment of the surrounding ecosystem. That sounds preachy so I should confess, it helped that I had our own heirlooms and cherries frozen and ready to go. We ran out a few months ago and I’ve been looking forward to preserving some more.

The tomatoes are great this year and baby LOVES them. She has a hard time eating the skin, so we peel or cut that away, otherwise she loves eating them baby led weaning style, a.k.a. as finger food.

Ok, funny story. I actually preserved my favorite batch of tomatoes last September, after my water broke and before I woke my husband to go to the hospital. True nesting. (You can read more of the story in this post.) Hey, I’m glad I did. It would never have happened once we came home. And having chopped heirlooms in pre-measured amounts of 2 cups made adding them to dishes super easy.

This weekend we finally had more than we can eat so I set about preserving. My mom got me a steam canner for my birthday, but I’m still a little intimidated (maybe that will be a future experiment and post.) She also gave me a book by Ball, as in the jars, on canning. It was weird, but the book actually said that freezing food was better than canning.

Here is my first, of hopefully many, step by step guides with pictures!

Freezing Tomatoes

1. Pick your tomatoes when they are ripe, just how you would like to eat them. (Or find some at a farmer’s market.)

2. Give them a quick rinse. (I might have skipped this step.)

3. Put a pot on the stove filled with water and bring to a boil.

4. Get a large bowl ready filled with ice water.

5. So that they will be easy to peel, score each tomato by making an “X” with a paring knife in the skin.

20120805-193946.jpg

6. Drop the tomato into the boiling water for a minute or two.

7. Transfer the tomato immediately into the ice bath for a couple minutes and then take out. The peel should be starting to fall off.

20120805-194031.jpg

8. When they are cool enough to handle, peel the tomatoes by hand and roughly chop. (I don’t chop them too small because they tend to shrink a little through the freezing and defrosting.)

20120805-194048.jpg

9. I like to measure them into 2 cup amounts. I put them in zip lock sandwich bags and then put the sandwich bags into a freezer bag.

10. Lay flat in the freezer.

20120805-190938.jpg

I would love to get away from plastic next time. Any suggestions?

I also made a super yummy cherry tomato confit last summer.  Our cherries haven’t been growing so much this year, but if they do and we get enough, I will definitely share that here, too. That one was also a repeater!